The OpenAI Apps SDK is a new framework for building AI-powered applications (ChatGPT “connectors”) that expose custom tools to ChatGPT. It works together with the Model Context Protocol (MCP) – an open spec that connects LLM clients to external tools and data. In this tutorial, we’ll walk through building a sample app (“Pizzaz”) using the Apps SDK and MCP. You’ll learn how to set up the development environment, configure your server, register tools and UI components, and deploy the app. We focus on the pizzaz_server_node example (in the OpenAI Apps SDK Examples repo) as a case study.
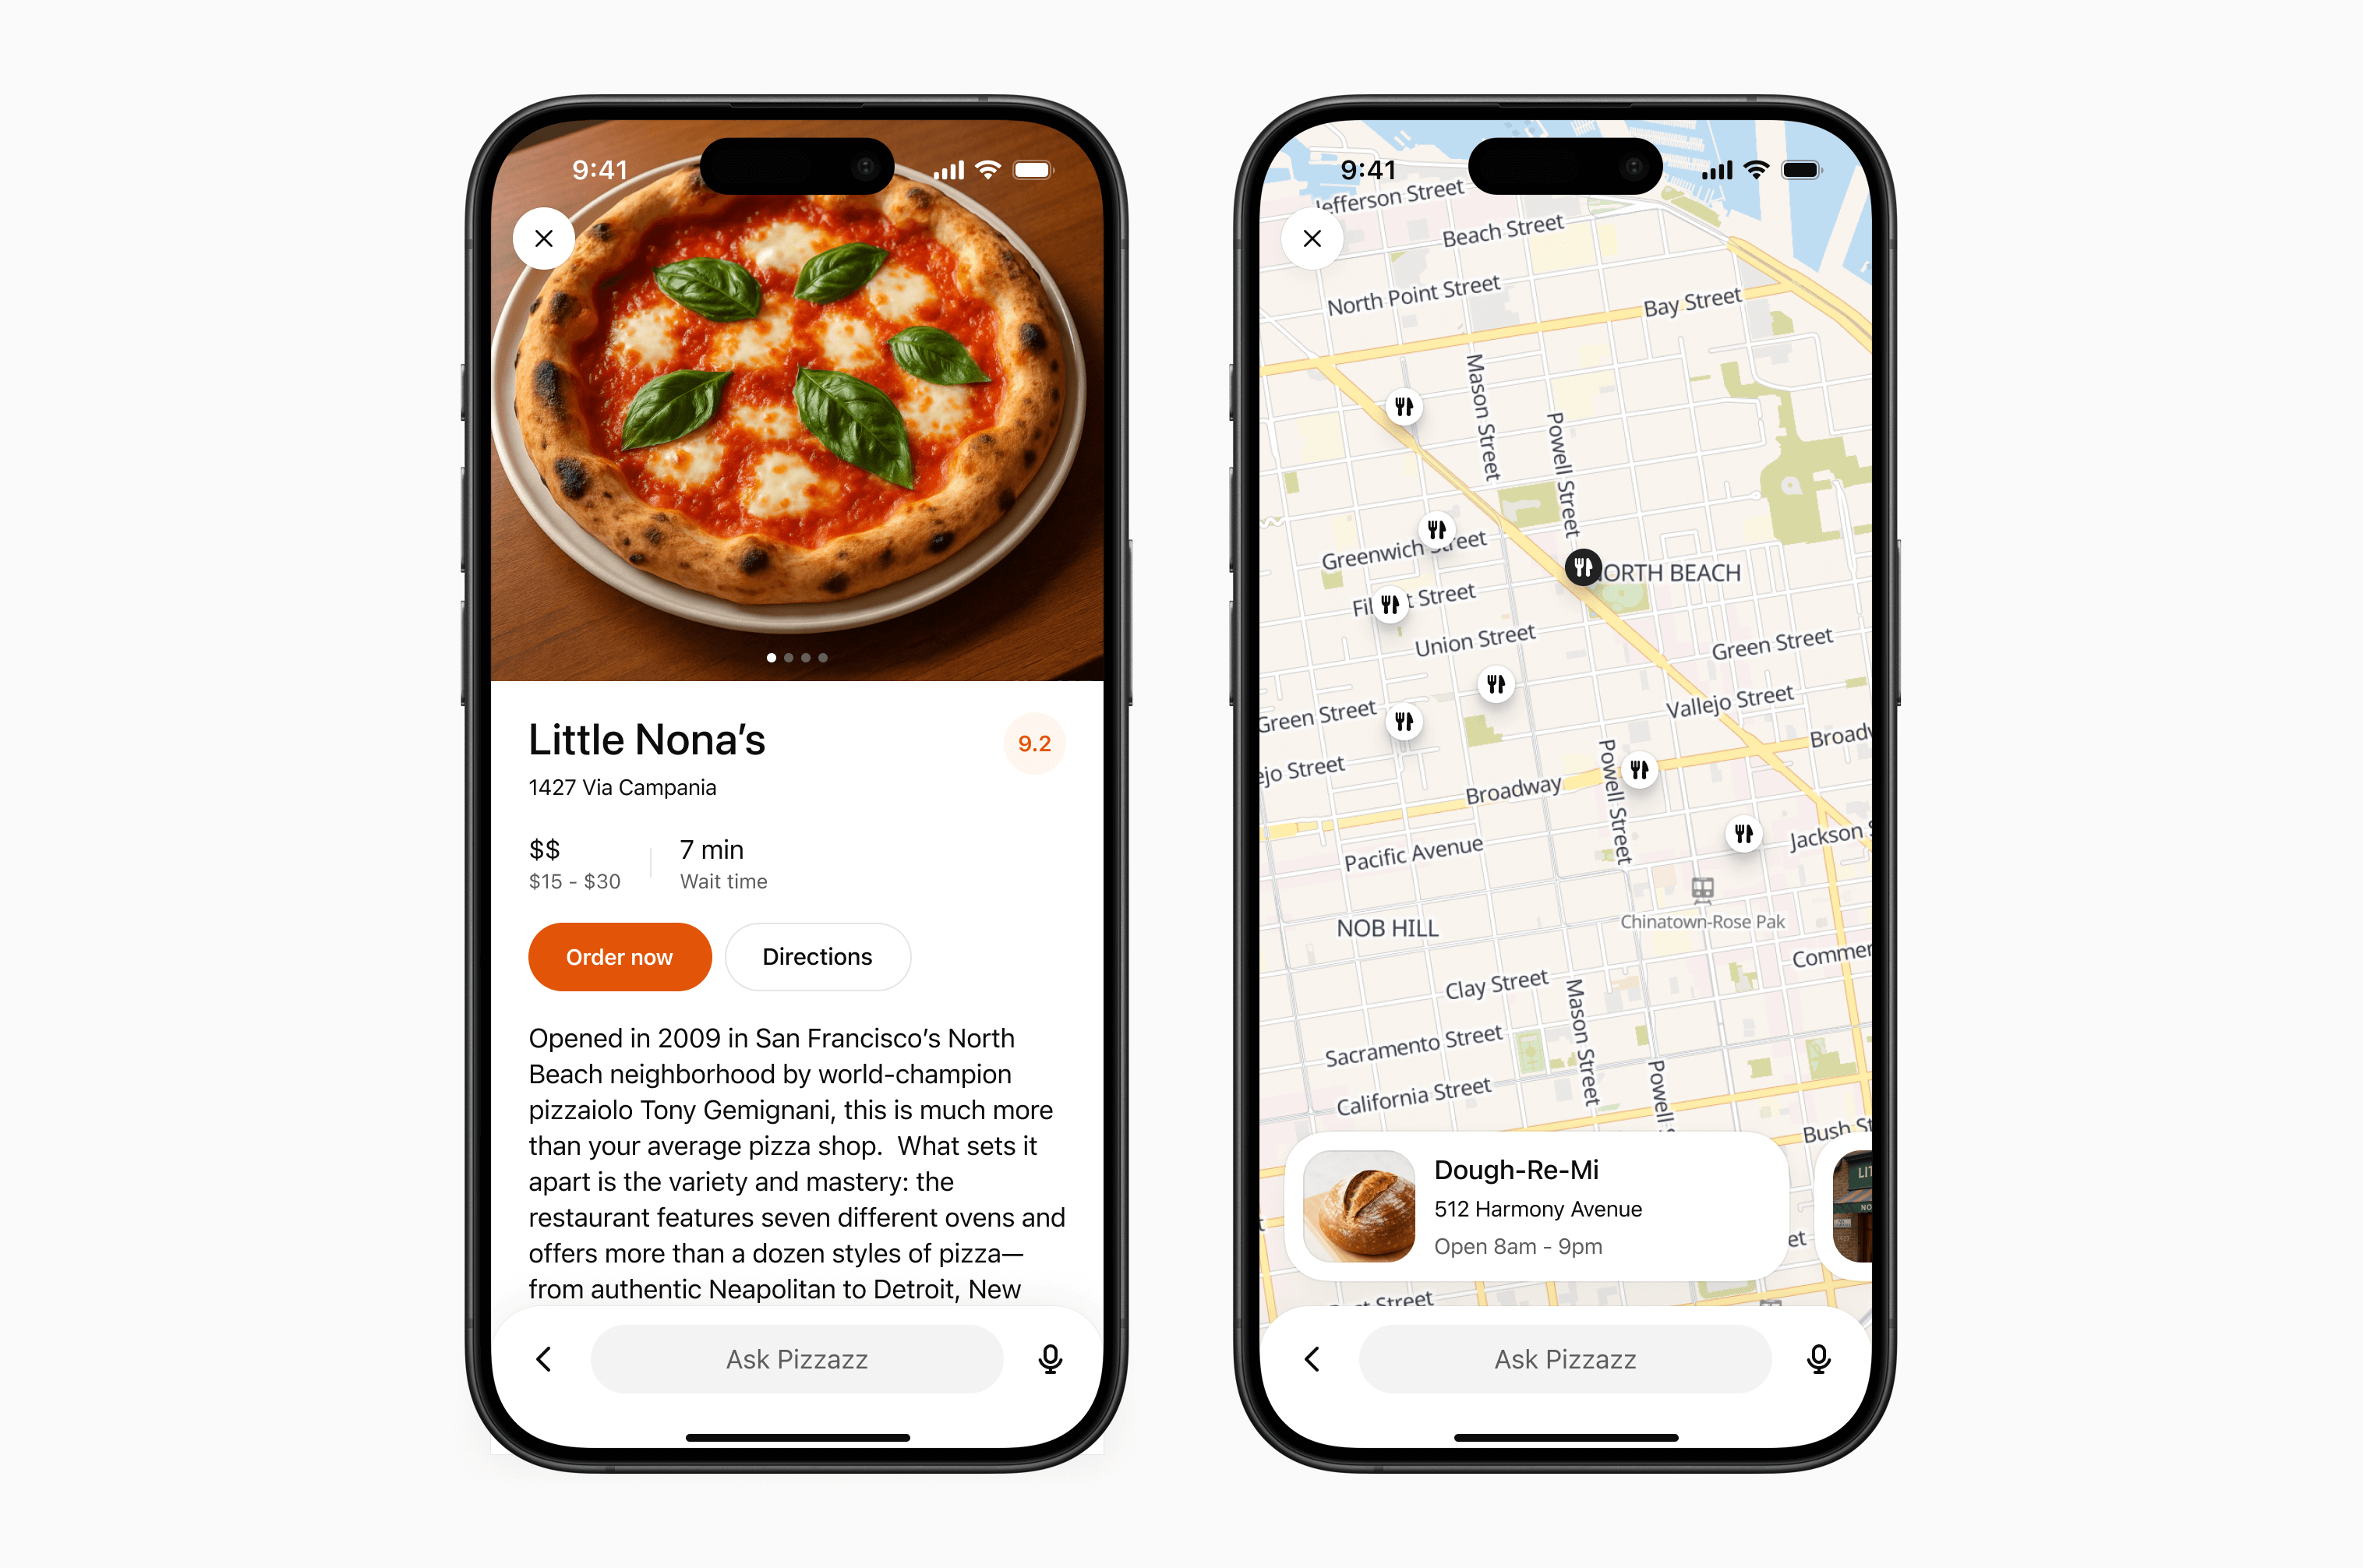
The App we will build in this guide - Pizza Restaurant ui and map view
How Apps SDK Works with MCP
Under the hood, a ChatGPT app is just a web service that implements the MCP specification. An MCP server exposes tools that ChatGPT can invoke during a conversation. Each tool has a JSON input/output schema and optional metadata. The model can list tools, call tools, and get structured results (often with embedded UI) back. A minimal MCP server for Apps SDK implements three key capabilities:
- List tools – advertise what tools (APIs or actions) your server provides, along with their input/output schema (e.g. using JSON Schema). This lets ChatGPT discover and describe your tools naturally.
- Call tools – when ChatGPT decides to use a tool, it sends a
call_toolrequest with user-provided arguments. Your server executes the action (e.g. fetch data, run a query) and returns a structured result. - Return components/widgets – along with structured JSON, you can include metadata (like an
outputTemplateURI) so that the Apps SDK client (ChatGPT UI) renders a custom interface (widget) inline with the conversation.
In practice, the Apps SDK uses MCP to “keep server, model, and UI in sync”. By standardizing the wire format, ChatGPT treats your connector just like a built-in tool. This yields several benefits:
- Discovery: ChatGPT’s launcher can list and invoke your custom tools by name, using your supplied metadata, just like official connectors.
- Conversation awareness: Tool outputs (JSON fields, IDs) flow through the chat. The model can reason over previous results, refer to IDs in follow-up turns, or replay the widget later.
- Multi-client support: MCP is platform-agnostic, so your connector works on ChatGPT Web and Mobile without changes.
- Extensible auth: MCP includes support for protected resources and OAuth flows, so you can secure access without inventing custom protocols.
The official examples repo shows all these pieces in action. Notably, the Pizzaz demo app combines several UI widgets with an MCP server to illustrate the full Apps SDK workflow. We’ll use the pizzaz_server_node example (a TypeScript server) as our blueprint.
Setting Up the Development Environment
Before coding, prepare your environment:
- Node.js 18+: Required for the TypeScript Apps SDK and tools.
- pnpm (preferred) or npm/yarn: The examples use
pnpmworkspaces. Install pnpm or skip “pnpm” to use npm. - OpenAI account: To test with ChatGPT, enable developer mode in ChatGPT settings. (No OpenAI API key is needed for MCP itself.)
For the Pizzaz example, you’ll also need to clone the openai-apps-sdk-examples repository. From your terminal:
git clone https://github.com/openai/openai-apps-sdk-examples.git
cd openai-apps-sdk-examples
The Apps SDK Examples repo contains UI widget sources and multiple demo servers (Pizzaz Node, Pizzaz Python, Solar System, etc.). We focus on the pizzaz_server_node folder.
Installing Dependencies and Building Components
After cloning, install all dependencies and build the UI assets:
-
Install workspace dependencies:
pnpm installThis pulls in the Apps SDK packages, build tools, and widget libraries.
-
Build the UI components:
pnpm run buildThe repository uses a Vite build orchestrator (
build-all.mts) to bundle each widget’s HTML/JS/CSS intoassets/. For example, the pizza widgets (pizza-map.html,pizza-carousel.html, etc.) get generated here. These static bundles are what the MCP server will serve as embedded components. -
(Optional) Start the dev asset server:
pnpm run serveThis serves
assets/over HTTP (on port 4444) so you can preview components standalone or let the MCP server fetch them via CORS.
With assets built, we can run the server.
Configuring the Pizzaz Server and Endpoints
The pizzaz_server_node example uses the official TypeScript SDK (@modelcontextprotocol/sdk) to create an MCP server. Although we won’t detail every line of code, the flow is:
- Create an Express (or similar) app: e.g.
const app = express();. - Initialize the MCP server: e.g.
const server = new McpServer({ transport: "stream-http" });. - Register resources and tools: Use
server.registerResource()to serve HTML widgets andserver.registerTool()to define each tool. - Mount MCP routes: Attach the MCP server to an endpoint, typically
/mcpor/tools. For example:app.use("/mcp", server.router());. - Listen on a port: e.g.
app.listen(8000, ...).
You can see this pattern in the example’s code (look for McpServer in pizzaz_server_node/src). The built assets live in ../assets, and the server serves them based on URIs like ui://widget/….
To start the Pizzaz Node server, run:
cd pizzaz_server_node
pnpm start
This runs the TypeScript server (via ts-node or a compiled JavaScript) on port 8000. Ensure it stays running.
Exploring the Pizzaz Server Node Example
Let’s break down what the Pizzaz server does:
Registering Tools and UI Resources
The server defines several “tools” (functions the app can perform) and associates each with a UI template. For example, in the code:
-
UI resources: These are static HTML for widgets. E.g.,
// Register a Map widget template
server.registerResource(
  "pizza-map",
  "ui://widget/pizza-map.html",
  {},
  async () => ({
    contents: [
      {
        uri: "ui://widget/pizza-map.html",
        mimeType: "text/html+skybridge",
        text: `
          <div id="pizzaz-root"></div>
          <script src="pizza-map.js"></script>
        `.trim(),
      },
    ],
  })
);
This tells the MCP server: when ChatGPT needs the
pizza-map.htmltemplate, return the HTML snippet (wrapping<div id="pizzaz-root">and needed scripts). The template URI (ui://widget/pizza-map.html) matches what the tool metadata will reference. -
Tools: Each tool has a name, a JSON schema for inputs, and a handler that returns a result. For instance, the “Show Pizza Map” tool:
server.registerTool(
  "pizza-map",
  {
    title: "Show Pizza Map",
    inputSchema: { pizzaTopping: z.string() },
    _meta: {
      "openai/outputTemplate": "ui://widget/pizza-map.html",
      "openai/toolInvocation/invoking": "Flipping a map",
      "openai/toolInvocation/invoked": "Here’s the pizza map!"
    }
  },
  async (args) => {
    // In a real app, you might use args.pizzaTopping to filter data.
    return {
      content: [{ type: "text", text: "Rendered a pizza map!" }],
      structuredContent: {}
    };
  }
);
Here, the tool name
pizza-mapand its JSON schema (apizzaToppingstring) are advertised. The_meta.outputTemplatepoints to our UI resource. When the tool is called, the handler returns a text message and (optionally) structured JSON. The Apps SDK will pair this with the pizza map widget in ChatGPT’s UI.
In summary, each tool registration ties a tool ID (like pizza-carousel) to a UI template (ui://widget/pizza-carousel.html) and a handler function. ChatGPT’s assistant knows from the schema when to call which tool, and once called, the _meta.openai/outputTemplate metadata tells it which embedded component to show.
Pizzaz UI Components (Map, Carousel, List)
The Pizzaz example uses several custom UI components. In ChatGPT, these appear inline with the conversation when their tool is invoked. For example, the map component shows pizza restaurant locations on a map. When a user asks “show me pizza places in San Francisco,” ChatGPT might trigger the pizza-map tool and render the map widget. Below is a screenshot of the Pizzaz map UI as it appears in ChatGPT:
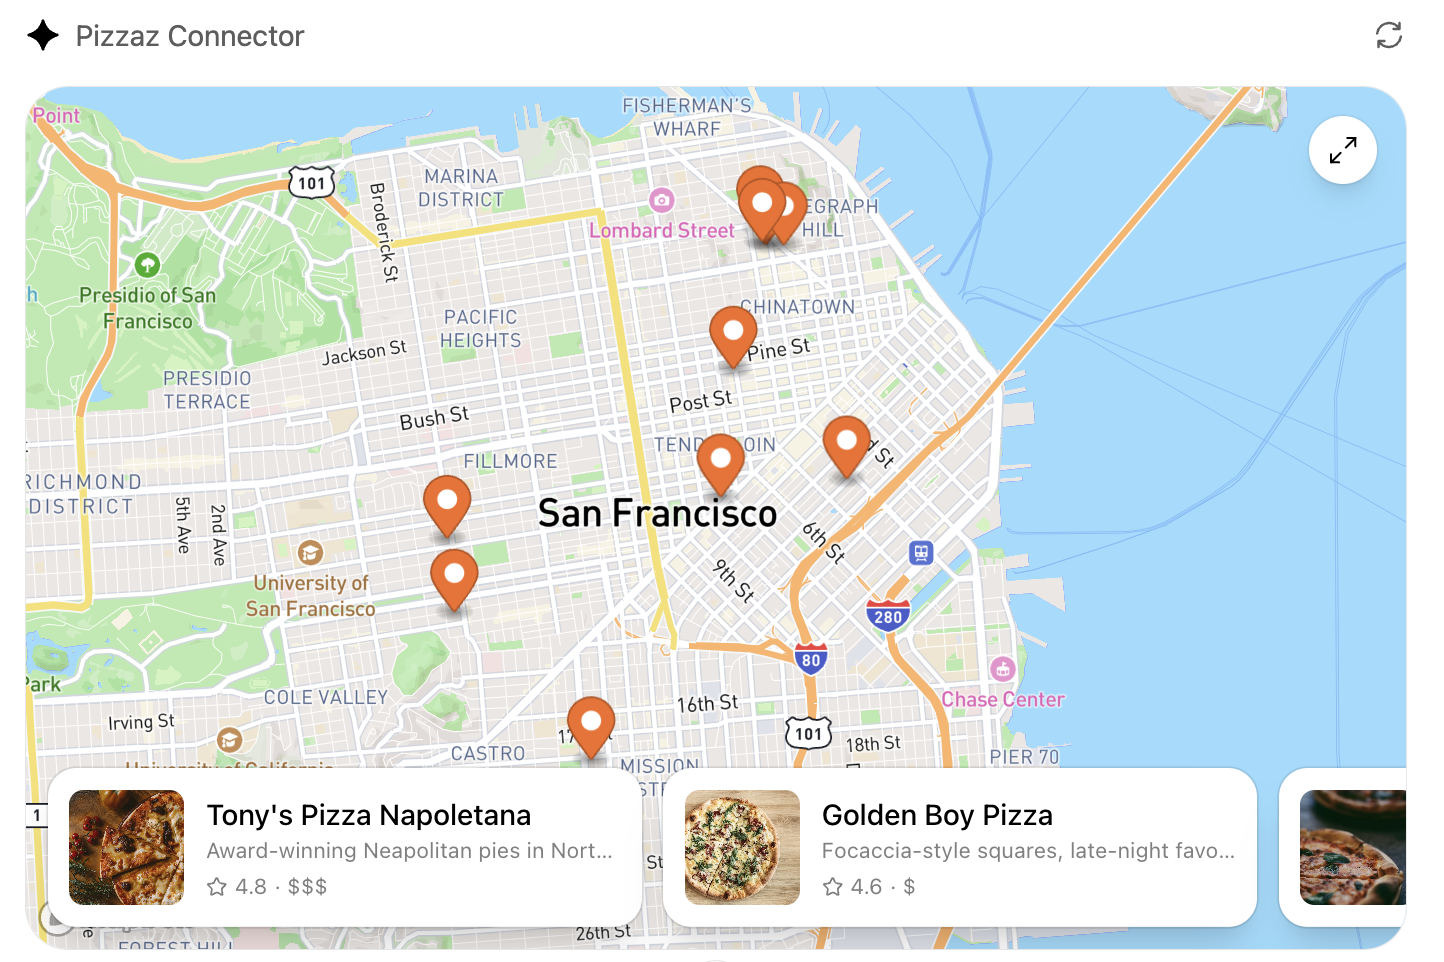
Screenshot: The Pizzaz map widget shows pizza spots on a Mapbox-powered map (integrated via the Apps SDK). When the “Show Pizza Map” tool is used, ChatGPT displays this interactive component in-line.
Pizzaz also includes a carousel widget – a horizontal scrollable gallery of images of pizza spots. Invoking the pizza-carousel tool renders this UI. For example:
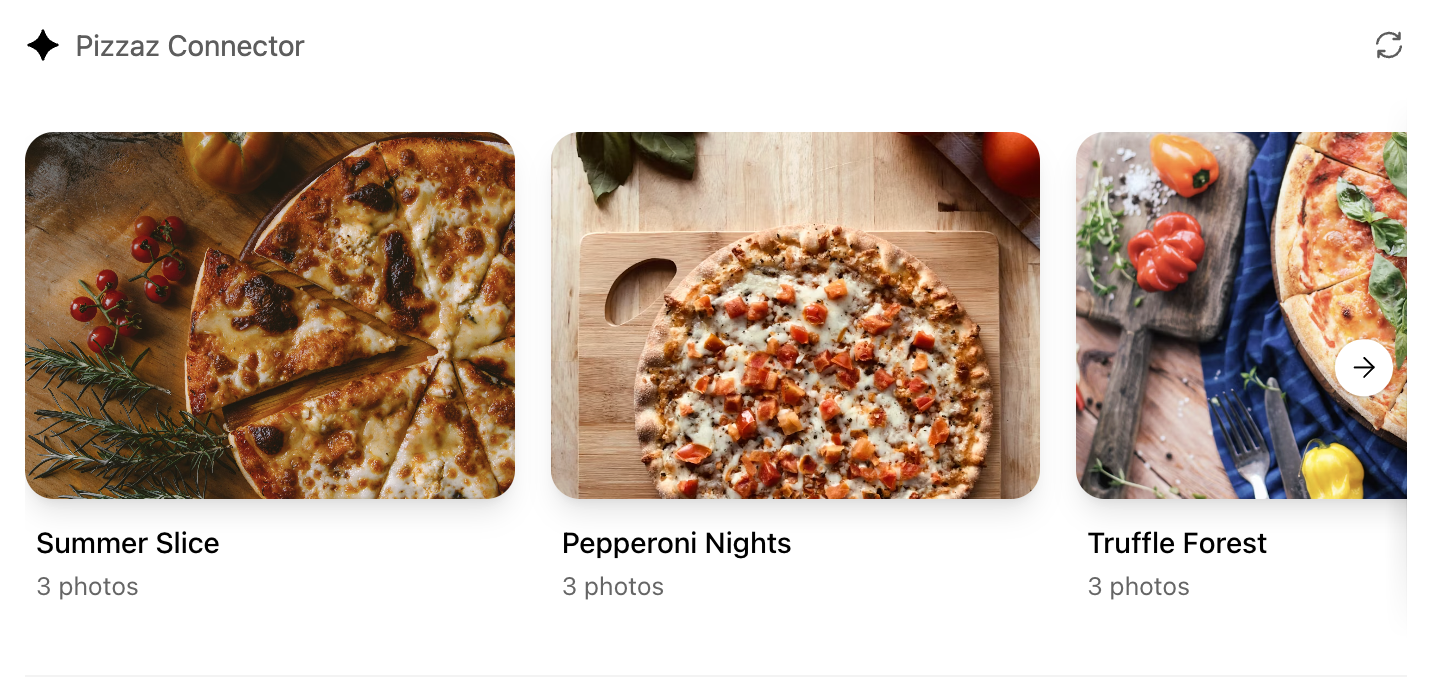
Screenshot: The Pizzaz carousel widget displays a gallery of pizza restaurants (with navigation arrows). It’s rendered when the “Show Pizza Carousel” tool is called.
Another example is the list widget, which shows a ranked list of pizzerias. When the pizza-list tool is used, ChatGPT shows something like this:
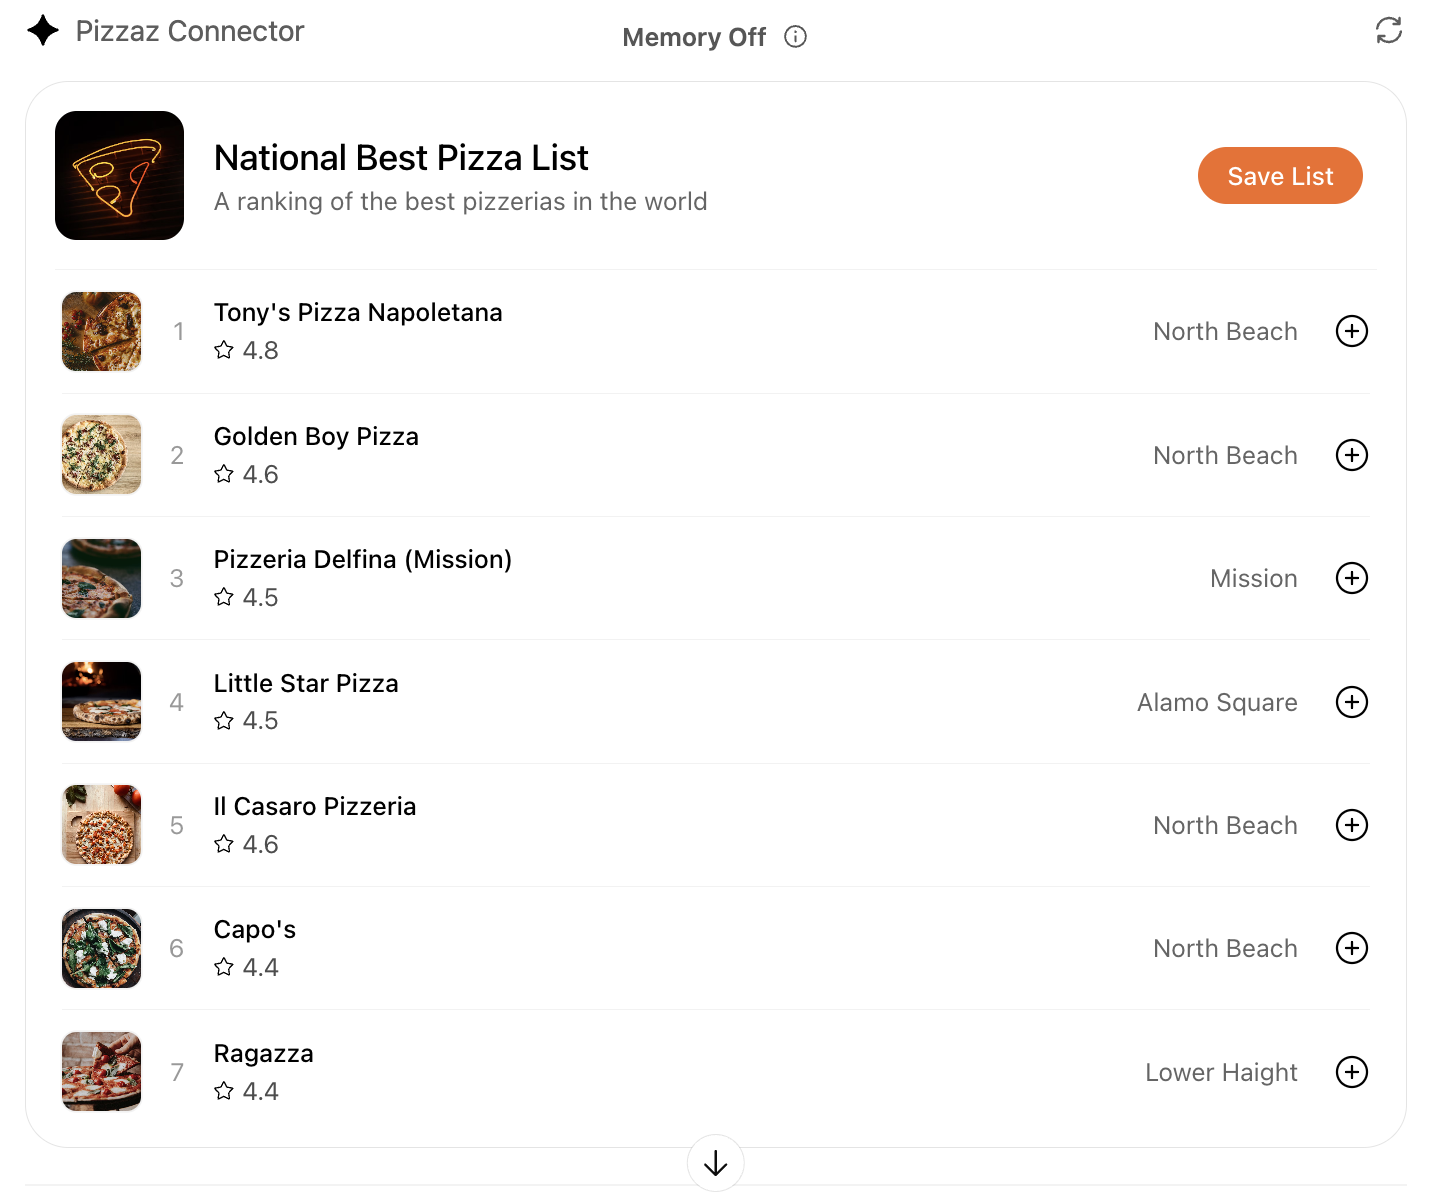
Screenshot: The Pizzaz list widget, showing a top-7 pizza list with images, ratings, and save buttons. This component is registered by the MCP server and injected via the output template metadata.
Each of these UI components is built with standard web tech (React, HTML, CSS, etc.) but is “wrapped” by the Apps SDK so ChatGPT can render them natively. The MCP server simply points to the prebuilt HTML/JS bundle for each component (from assets/), and ChatGPT takes care of displaying it.
How It All Fits Together
When a user interacts with ChatGPT, the flow is: ChatGPT sees a user request, decides one of your tools matches the intent, and issues a call_tool via MCP. For example, user: “Show me pizza shops near me.” → model triggers pizza-map. The MCP server runs the corresponding handler (which could call external APIs or databases for real data) and returns content + metadata. Because we set "openai/outputTemplate": "ui://widget/pizza-map.html", ChatGPT then renders the map widget with the (HTML+JS) we served. The chat continues with structured JSON available for the model to reference if needed.
In the Pizzaz Node code, most handlers are placeholders returning static text (“Rendered a pizza carousel!”). In a real app, you’d replace those with actual logic (e.g. call Yelp or Google Maps APIs). The beauty of the Apps SDK is you can mix tools (logic) with components (UI) seamlessly.
Deploying the App
Once your MCP server is working locally, you can connect it to ChatGPT. In development, enable Developer mode in ChatGPT and use a tool like ngrok to tunnel to your local server. For example:
ngrok http 8000
Ngrok will give you a public HTTPS URL (e.g. https://abc123.ngrok.io/mcp) that you can add as a custom connector in ChatGPT’s Settings > Connectors. ChatGPT will then send MCP requests to your local server through the tunnel.
For production, host your MCP server behind a stable HTTPS endpoint. Suitable platforms include cloud services like Fly.io, Render, Railway, or Google Cloud Run. Make sure your server’s /mcp endpoint supports streaming HTTP (needed for partial results) and proper status codes. With a public URL, simply add the connector in ChatGPT and your app is live.
Tips: Expanding the App and Use Cases
After following this tutorial, you have a working ChatGPT app connector. Here are some ways to expand it or apply it:
- Add real data sources: Replace the placeholder handlers in
pizzaz_server_node/srcwith real API calls. For example, fetch live restaurant data based onpizzaToppingor user’s location. - Build new tools: Define additional tools in MCP for other features (e.g. an “order pizza” action, or a “suggest restaurants” tool). Each can have its own UI.
- Create custom widgets: Design your own React/HTML components and add them to the
src/gallery. The build system will bundle them toassets/automatically. - Integrate Auth or Persistence: Use Apps SDK’s support for OAuth 2.0 if you need user-specific data or login. Add state persistence (e.g. save favorites) by connecting a database.
- Potential use cases: Think beyond pizza! The same pattern works for any domain. For example, a travel planner could use a map widget for attractions, a list for itineraries, and tools to fetch flight/hotel info. A finance assistant might use graphs or tables as widgets.
- Follow design guidelines: Ensure your conversational flows feel natural in ChatGPT and follow the official guidelines for UX and safety. Rich metadata (titles, descriptions) helps ChatGPT know when to launch your tool.
The key takeaway is that the OpenAI Apps SDK (with MCP) lets you build AI apps with OpenAI by defining tools + components. The Pizzaz Node example is a tutorial scaffold – use it as a template. Experiment with it, read the comments in the code, and adapt the architecture to your needs. For more details, refer to OpenAI’s documentation and the Apps SDK examples. Happy building!
Sources: The above tutorial references the official OpenAI Apps SDK and MCP documentation and examples. The Pizzaz example is from the OpenAI Apps SDK Examples GitHub repository. The embedded screenshots are from OpenAI’s Apps SDK docs.